Water stains on the ceiling are the kind of thing Long Island homeowners try to explain away. Maybe it was a one-time thing. Maybe the last storm was just unusually severe. Maybe it will dry out on its own. Then the next rain arrives and the stain spreads, and the question that should have been asked weeks ago becomes urgent: where is this water coming from, and what is it going to take to stop it?
In the majority of cases where a roof appears structurally sound but still leaks, the culprit is not the shingles themselves. It is the flashing. Roof flashing repair is one of the most common and most frequently overlooked roofing services on Long Island, and addressing it correctly is the difference between a problem that is solved and one that keeps coming back. At Ready Roof, we serve Nassau and Suffolk County homeowners with professional roofing services including expert roof flashing repair, and we have seen firsthand how much damage a small flashing failure can cause when it is not caught early. This guide covers everything you need to know about recognizing flashing problems, understanding what they cost to fix, and why getting it done right the first time matters.
What Is Roof Flashing and Why Does It Matter?
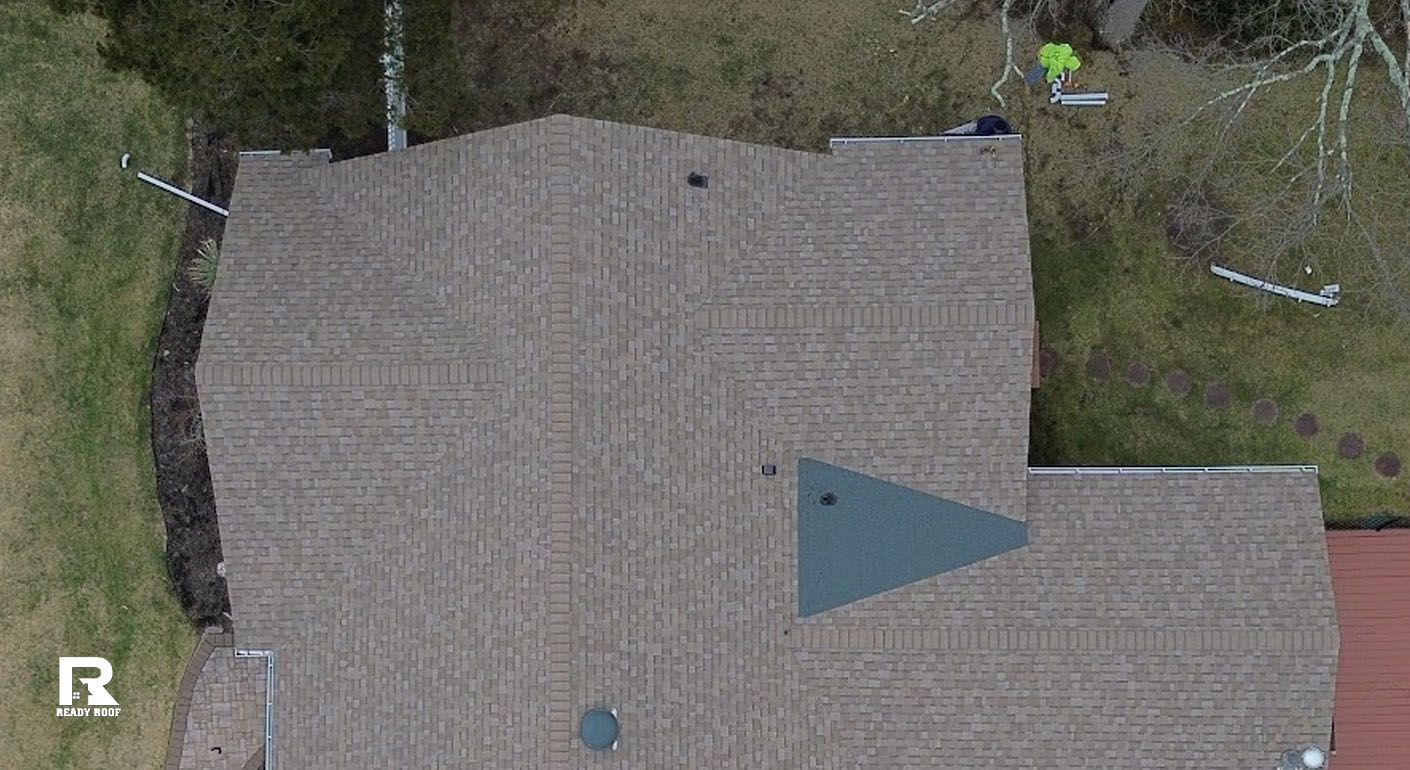
Roof flashing is thin sheet metal, typically aluminum, galvanized steel, or copper, installed at every point where a roof surface meets a vertical structure or transitions between planes. Chimneys, skylights, dormers, vents, walls, and roof valleys are all locations where water management requires something more than shingles alone. Flashing fills that gap, directing water away from vulnerable joints and guiding it back onto the roof surface where it can drain safely.
The reason flashing is so consequential is that roofs fail at transitions. A shingle field handles rainfall well because it is continuous and pitched. Where the roof meets a chimney, a wall, or another roof plane, there is a joint that water will find and exploit if it is not properly sealed. Flashing is the system that manages that risk. When it is installed correctly and in good condition, it works invisibly. When it fails, it becomes the source of some of the most persistent and damaging leaks a homeowner will deal with.
Learn more about our commitment to providing Long Island homeowners with reliable, high-quality roofing solutions.
![]()
Types of Roof Flashing and Where Each One Lives
Understanding the different flashing components on your roof helps you have a more informed conversation with a roofing contractor and recognize where inspection should focus.
Chimney Flashing
Chimney flashing is arguably the most complex and failure-prone flashing system on a residential roof. It involves multiple components: step flashing that runs up the sides of the chimney as it meets the roof slope, counter flashing that is embedded in the chimney mortar joints and overlaps the step flashing below, and base flashing at the bottom where the chimney meets the roof. Chimney flashing roof repair is one of the most common services we perform at Ready Roof, and the chimney junction is one of the first places we look when a homeowner reports an unexplained interior leak.
Valley Flashing
Where two roof slopes meet and form a valley, water from both planes drains into that channel with significant volume during a rainstorm. Valley flashing, typically a continuous piece of metal or a special membrane system, lines this channel and protects it from the concentrated water flow. Damaged or improperly installed valley flashing can allow water to migrate under the surrounding shingles quickly and cause widespread damage across a significant area of the roof structure.
Step Flashing at Walls
Where a roof slope meets a vertical wall, such as at a dormer, an addition, or a sidewall adjacent to a higher roofline, step flashing is installed in individual L-shaped pieces that interleave with each course of shingles. Each piece of step flashing overlaps the one below it, creating a layered barrier that directs water outward and downward. Step flashing failures are common because each individual piece is a potential failure point, and deterioration tends to develop gradually in ways that are not visible from the ground until a leak has already begun.
Vent and Pipe Boot Flashing
Every plumbing vent stack, exhaust vent, and pipe penetration through the roof is surrounded by a boot flashing, a rubber or metal collar that seals the gap between the pipe and the surrounding shingles. Rubber boots degrade with UV exposure and temperature cycling, cracking and pulling away from the pipe over time. This is one of the more commonly overlooked flashing failures because the pipes are not always visible in an inspection from the eaves and the failure mode develops gradually.
Drip Edge Flashing
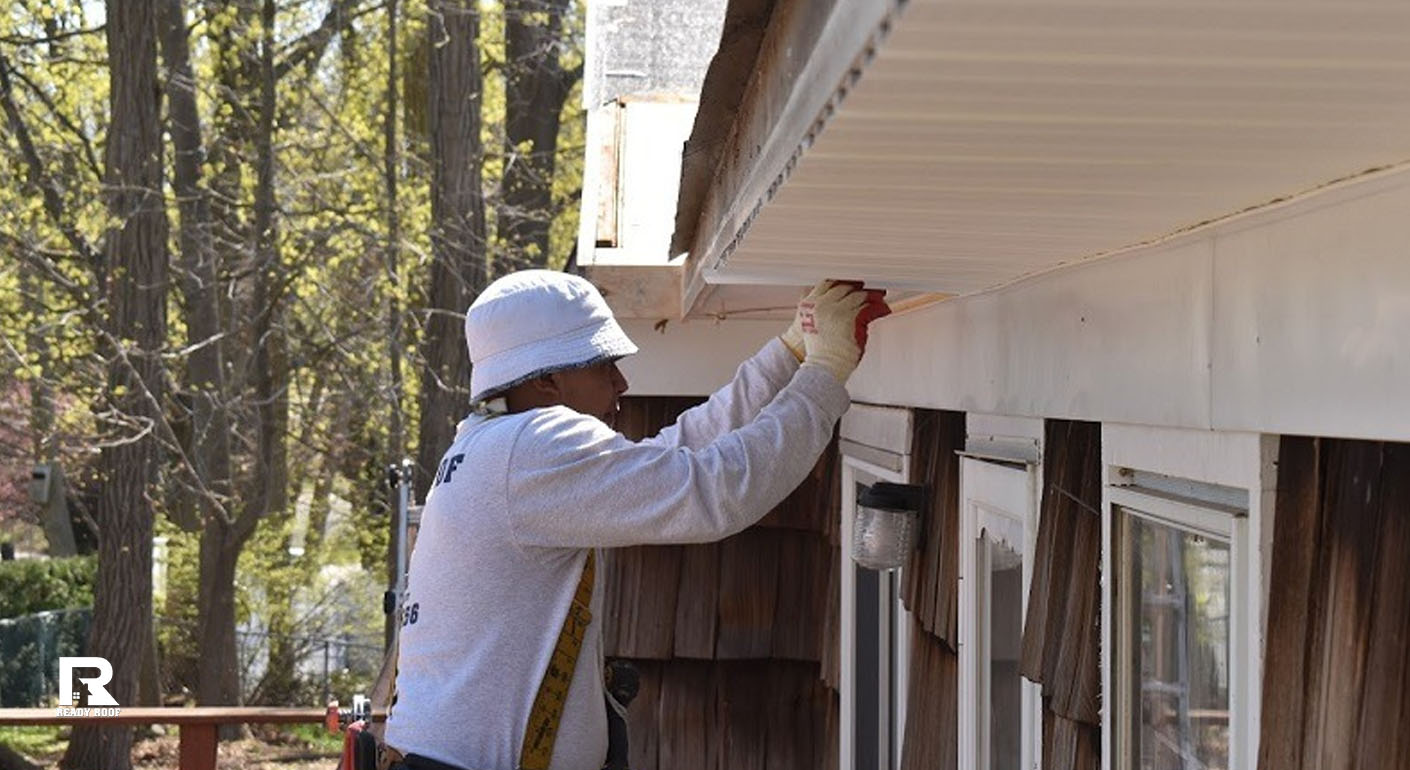
Drip edge is installed along the eaves and rakes of the roof, directing water off the roof edge cleanly into the gutters rather than allowing it to wick back under the shingles or behind the fascia. Missing or improperly installed drip edge is a common finding on older Long Island homes and contributes to fascia rot, soffit damage, and ice dam formation in winter.
Signs Your Roof Flashing Is Failing
Flashing failures rarely announce themselves dramatically. They tend to develop gradually and show indirect symptoms before the source becomes obvious. Recognizing these signs early is what keeps roof flashing repair a manageable expense rather than a structural remediation project.
Water Stains on Interior Ceilings or Walls
Interior staining that appears near a chimney, a dormer, a skylight, or an exterior wall above is one of the clearest indirect indicators of flashing failure. The stain location does not always correspond directly to the leak source because water travels along structural members before dripping through. A stain near the chimney, for example, almost always points to chimney flashing as the entry point even if the stain appears a foot or two away from the chimney wall.
Visible Rust, Separation, or Lifting
From the ground or from a ladder inspection, look for rust staining on metal flashing, visible gaps where flashing has pulled away from the chimney or wall surface, or sections of flashing that have lifted away from the roof surface. Caulk that has cracked, dried, and pulled away from the joint it was covering is also a visible sign that the seal has failed. Old flashing repairs made with roofing tar or caulk alone rather than properly formed metal are particularly prone to this kind of failure.
Granule Accumulation Near Specific Roof Features
Heavy granule accumulation in gutters beneath chimney areas or dormers can indicate that the surrounding shingles are experiencing accelerated wear, often because water is repeatedly infiltrating and then drying under the shingle surface near a failed flashing joint. Shingles that are visibly darker, wetter, or more granule-depleted near roof transitions are another surface sign worth investigating.
Mold or Mildew in the Attic
Moisture entering through failed flashing does not always make it all the way to a visible ceiling stain right away. It may first accumulate in the attic, producing mold growth on sheathing or structural members, a musty odor detectable when the attic hatch is opened, or staining on the underside of the roof deck near specific penetration or transition points. Regular attic inspections, even just a visual check with a flashlight, can catch flashing failures before they reach the living space.
During an inspection, we pay close attention to critical areas like chimney flashing to prevent hidden water damage.
Why Roof Flashing Fails on Long Island
Long Island’s climate creates a particularly demanding environment for roof flashing systems. The freeze-thaw cycling that runs through Nassau and Suffolk County winters is especially hard on the sealants and caulks that supplement metal flashing at transition points. As temperatures drop, materials contract. As they rise, they expand. Repeated cycles work sealants loose, cause metal to fatigue at bends, and open gaps that were tight at installation.
The salt air environment in coastal areas of Long Island accelerates corrosion in galvanized steel flashing, shortening the useful life of systems that might last decades in inland locations. UV degradation affects rubber boot flashings and sealant compounds similarly. And the heavy rain events that accompany nor’easters and late-summer tropical systems put the entire flashing system under maximum stress precisely when failures are most consequential.
Poor original installation is another major factor. Flashing that was not embedded correctly into chimney mortar, not layered properly with the shingle courses, or sealed with caulk alone rather than formed metal will fail sooner than properly installed systems under the same conditions. Many of the roof flashing repair calls we receive at Ready Roof involve systems that were installed improperly at the outset rather than systems that simply wore out with age.
What Does Roof Flashing Repair Cost in Suffolk County?
Roof flashing repair costs in Suffolk County vary considerably based on which flashing system is failing, the scope of the repair, the material being used, and site accessibility factors. Here is a realistic framework for understanding the cost range.
Spot Repairs on Accessible Flashing
A minor repair on a single section of accessible step flashing, a pipe boot replacement, or resealing a short section of valley flashing typically runs in the range of a few hundred dollars including labor and materials. These are the most straightforward roof flashing repair scenarios and can often be completed in a few hours by an experienced crew.
Chimney Flashing Repair or Replacement
Chimney flashing is more complex and more expensive to address properly. A full chimney flashing replacement involving new counter flashing embedded in the mortar joints, new step flashing integrated with the surrounding shingles, and new base flashing at the chimney base typically runs from several hundred to over a thousand dollars depending on chimney size, roof pitch, and accessibility. Partial repairs that address specific failure points without replacing the full system are possible when the remaining flashing components are still in good condition.
Valley Flashing Replacement
Replacing a roof valley involves removing the shingles surrounding the valley, installing new valley material, and reinstalling the shingles. This is more labor-intensive than simpler flashing repairs and typically costs more, particularly on steep pitches or complex valley configurations.
Factors That Affect Final Cost
Roof pitch is one of the most significant labor cost drivers. Steep roofs require more time and more safety equipment to work on safely. Chimney height and accessibility affect cost similarly. The material chosen for the replacement flashing matters as well. Copper is the longest-lasting and most corrosion-resistant option and carries a premium over aluminum or galvanized steel. For Long Island coastal properties where salt air accelerates corrosion, copper or high-grade aluminum is worth the additional investment.
At Ready Roof, we provide clear, transparent estimates before any work begins. Our inspections use advanced diagnostic tools and drone photography when appropriate so we can show you exactly what we found and explain precisely what the repair involves. Every estimate reflects the actual scope of work required rather than a number designed to win the bid.
Repair vs Full Replacement: How to Know Which You Need
Not every flashing problem requires a full replacement of the flashing system. Understanding which approach is appropriate requires an honest assessment of the existing flashing’s condition.
Repair is appropriate when the failure is isolated to a specific point, the surrounding flashing material is still structurally sound and properly attached, and the repair can be made in a way that will hold up for a meaningful period of time. Sealing a single separation at a chimney counter flashing edge, replacing one failed pipe boot, or addressing a small section of lifted step flashing are all legitimate repair scenarios.
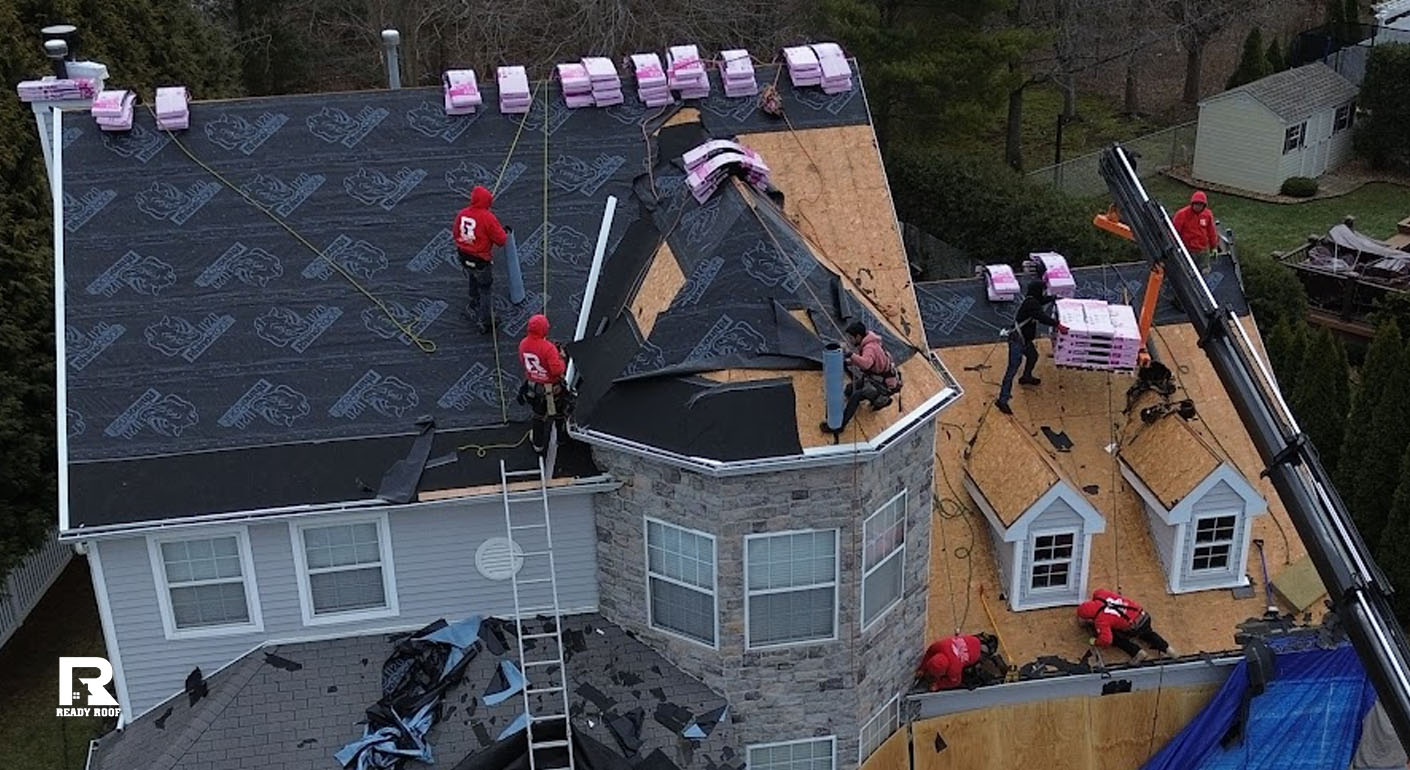
Full replacement is appropriate when the flashing system is old enough that the entire installation is approaching end of life, when multiple failure points exist across the same flashing assembly, when the original installation was substandard in ways that cannot be corrected with spot repairs, or when the flashing is being accessed as part of a larger scope of work like a full roof replacement. At Ready Roof, we replace all flashing systems as part of any full roof replacement because installing new shingles over deteriorated or improperly installed flashing negates much of the value of the new roof.
How Professional Roof Flashing Repair Works
Understanding what a quality roof flashing repair involves helps you evaluate what a contractor is proposing and recognize whether corners are being cut.
The process begins with a thorough inspection that goes beyond the visible symptoms. We assess the condition of the flashing system at the reported leak location, then inspect adjacent transitions and penetrations to determine whether the identified failure is isolated or part of a broader pattern. Using drone imagery and advanced diagnostic tools, we document what we find and present it clearly before recommending a course of action.
For chimney flashing repair, proper work involves removing any existing caulk or sealant, removing the failed flashing sections, cutting new reglets into the chimney mortar if the counter flashing needs to be re-embedded, forming and installing new metal flashing components to fit the specific geometry of the chimney and roof, and integrating the new flashing correctly with the surrounding shingle courses. Sealant is applied only as a supplement to properly formed metal, never as a substitute for it.
For step flashing repairs, each individual flashing piece is removed and replaced in proper sequence with the surrounding shingles, maintaining the interleaved layering that gives step flashing its water management function. For boot flashings, the old boot is cut away, the replacement is slid over the pipe, sealed at the collar, and integrated with the surrounding shingles.
After repair work is complete, we conduct a final inspection to verify that all repaired areas are properly integrated and sealed. At Ready Roof, our owner Ryan Coyne is actively involved in quality oversight, and we have built a reputation across Long Island on results that hold up rather than repairs that need to be revisited.
Why DIY Flashing Fixes Rarely Hold Up
Hardware stores sell roofing tar, flashing tape, and sealant products marketed for DIY roof repairs, and it is genuinely tempting to try to address a flashing leak without calling a contractor. The practical results of this approach are almost always disappointing for one fundamental reason: the products that are easiest to apply, roofing tar and caulk in particular, do not address the underlying structural cause of the failure. They fill a gap temporarily, but they do not bond metal correctly to masonry or integrate with shingle courses the way properly formed metal flashing does. Within one or two seasonal cycles, the material degrades, the gap reopens, and the leak returns.
More significantly, working on a roof carries real safety risk. Roof pitch, wet surfaces, and the physical demands of the work create accident conditions that claim lives every year. The cost of a professional roof flashing repair is almost always lower than the cost of an emergency room visit, and the result is one that actually holds up through the next nor’easter rather than one that provides temporary reassurance.
Protecting your home shouldn’t be a financial burden; explore our flexible financing options to get the repairs you need today.
![]()
Frequently Asked Questions
How do I know if my roof is leaking from flashing or from shingles?
The location of a leak relative to roof features is the most useful diagnostic indicator. If the interior water damage appears near a chimney, skylight, dormer, plumbing vent, or the point where the roof meets a wall, flashing failure is the most probable cause. If the damage appears in the middle of a roof field away from any transitions or penetrations, shingle failure is more likely. In many cases, both are contributing factors, which is why a professional inspection that evaluates the full condition of the roof rather than just the obvious symptom produces the most reliable diagnosis.
How long does roof flashing typically last?
The lifespan of roof flashing depends heavily on the material it is made from and the conditions it faces. Copper flashing is the most durable option and can last 50 years or more when properly installed. Aluminum flashing typically lasts 20 to 30 years in moderate conditions but degrades faster in coastal environments with salt air exposure. Galvanized steel flashing has a similar lifespan to aluminum but is more vulnerable to rust. Rubber or neoprene boot flashings around pipe penetrations have shorter lifespans, typically 10 to 20 years, because UV radiation and temperature cycling degrade the rubber faster than metal alternatives. In Suffolk County’s coastal climate, being proactive about flashing inspection as systems approach the lower end of these ranges is the most cost-effective approach.
Can roof flashing be repaired without replacing the shingles around it?
In many cases, yes. Step flashing repairs often require carefully lifting the surrounding shingles to access the flashing beneath, which can typically be done without damaging the shingles if they are in reasonably good condition. The shingles are then re-laid over the new flashing. Chimney counter flashing can sometimes be repaired by re-embedding the existing metal in fresh mortar if the metal itself is sound. However, if the surrounding shingles are brittle, heavily worn, or have been sealed against the flashing with roofing tar, accessing the flashing without shingle damage becomes more difficult. A professional inspection determines whether shingle removal and replacement is necessary as part of the repair scope.
What is the difference between flashing and caulk for roof sealing?
Flashing is formed metal that physically redirects water away from vulnerable joints through geometry. Caulk and sealant are flexible compounds that fill gaps and create a waterproof seal at specific points. The important distinction is that properly designed flashing does not rely on caulk to function. Caulk is used as a secondary sealant at specific transition points where metal alone cannot provide a complete seal, such as where counter flashing enters a mortar joint. When caulk is used as the primary water management strategy at a transition, rather than as a supplement to proper metal flashing, it will fail within a few years as it dries, cracks, and pulls away from the surfaces it was bonding.
Should roof flashing be replaced when getting a new roof?
Yes, in most cases. When a full roof replacement is performed, all flashing components should be replaced as part of the scope of work. Installing new shingles over deteriorated, improperly installed, or aged flashing means the new roof is only as watertight as the flashing beneath it, and any flashing failures will cause leaks in the new roof just as they did in the old one. Some flashing, particularly copper chimney flashing in very good condition, can sometimes be retained and reused, but this should be a deliberate decision made after careful inspection rather than a default approach. At Ready Roof, we replace all flashing as standard practice in our roof replacement process.
Stop the Leak Before It Becomes Something Bigger
Roof flashing repair is one of those problems where timing is everything. A small separation at a chimney flashing joint or a cracked pipe boot is a straightforward, relatively affordable repair when it is caught early. Left unaddressed through a few more winters of freeze-thaw cycling and nor’easter rainfall, that same failure produces water damage to attic sheathing, insulation, and eventually the interior finishes of the living space below. The repair cost grows with every season it is ignored.
Ready Roof has been serving Long Island homeowners across Nassau and Suffolk County with roofing services built on honest assessment, quality materials, and craftsmanship that holds up. Owner Ryan Coyne brings a three-generation legacy of building expertise to every project, and our team approaches every roof flashing repair with the same attention to detail that our full roof replacement clients receive. With over 1,000 roofs completed and 250-plus five-star reviews from Long Island homeowners, our reputation is built on results rather than promises.
If you are seeing signs of a flashing failure or want a professional inspection to assess the condition of your roof’s flashing systems, contact Ready Roof today at (631) 892-9165 or visit readyroofli.com. We respond within 24 business hours, and we are ready to show you exactly what your roof needs.